How to Contour Pale Skin For a Flawless Look
If you have pale skin and have ever tried to follow a contouring tutorial only to end up looking like you smudged dirt on your face, you’re definitely not alone. Most contouring advice seems designed for medium to deep skin tones, leaving those of us with lighter complexions wondering if we’re just doomed to look muddy or orange. Spoiler alert: we’re not. You just need to approach contouring a little differently.
Table of Contents
Why Contouring Pale Skin is Tricky

Let’s start with why this is challenging in the first place. Pale skin has less natural contrast, which means when you add too much depth or use the wrong undertones, it can look really obvious and unnatural. Most contour products are designed with warmer, deeper skin tones in mind, so they often pull too orange or muddy on fair complexions.
The other issue? We tend to have more visible veins and redness, which means our undertones can be all over the place. You might have cool pink undertones in some areas and warm yellow ones in others. This makes finding the right contour shade feel like solving a puzzle.
Finding Your Perfect Contour Shade
This is honestly the most important part, and it’s where most pale-skinned people go wrong. Forget everything you’ve heard about bronzers and warm browns – they’re probably not for you.
Look for Cool-Toned Shades
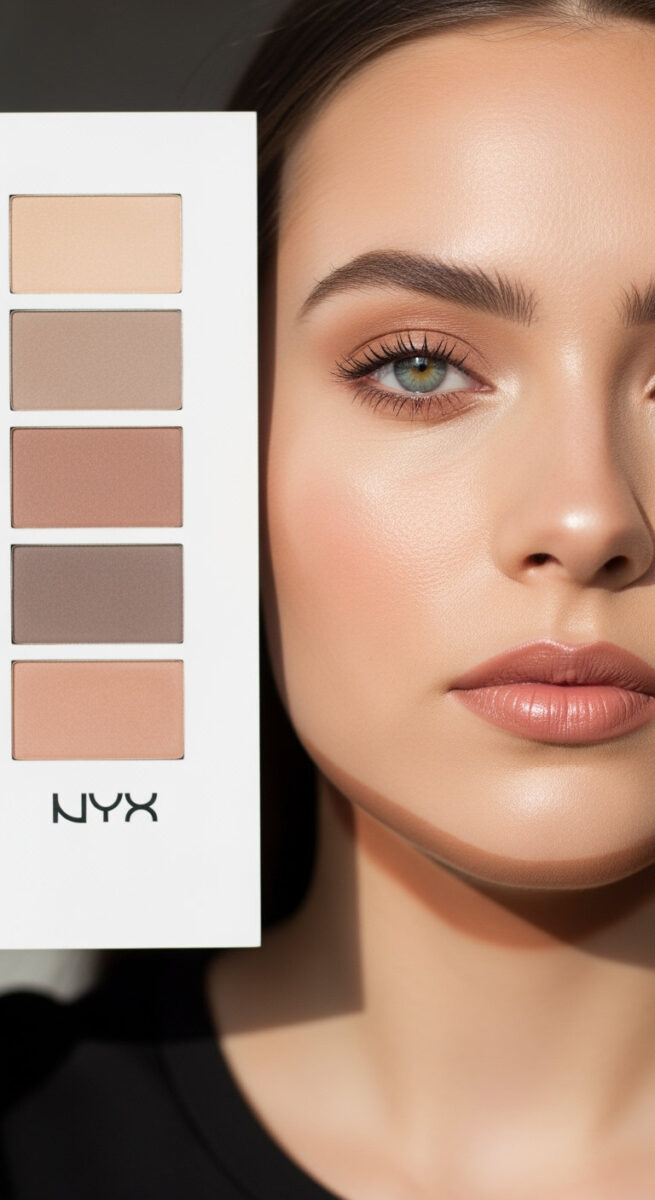
Your contour should mimic natural shadows, and shadows are cool-toned. Look for shades that have gray or taupe undertones rather than warm browns or oranges. Think about the natural shadows on your face when you’re in natural light – they’re not warm and bronzy, they’re cooler and more muted.
Some of my favorite pale-friendly contour shades are taupe-grays, cool light browns, and even some mauves. Brands like Kevyn Aucoin, Fenty Beauty, and NYX have great options for lighter skin tones.
The Paper Test
Hold a white piece of paper next to your face in natural light. This will help you see your true undertones. If you look pink or red next to the paper, you have cool undertones and should stick with cooler contour shades. If you look yellow or golden, you can handle slightly warmer tones, but still avoid anything too orange or bronze.
Test on Your Jawline
When you’re testing contour shades, don’t test them on your hand – test them along your jawline where you’d actually use them. The right shade should look like a natural shadow, not like you’ve drawn a line on your face.
The Right Tools Make All the Difference

For pale skin, precision is everything. You can’t just sweep product around and hope for the best – you need control.
Brushes vs. Beauty Sponges
I’m team brush for pale skin contouring. A small, dense, angled brush gives you way more control than a big fluffy brush or a beauty sponge. You want to be able to place product exactly where you want it and build it up gradually.
Look for a brush that’s firm enough to pick up product but not so stiff that it’s scratchy. The angle should fit naturally into the hollows of your cheeks and along your hairline.
Cream vs. Powder
This is really personal preference, but I find cream contour products work better for beginners with pale skin. They’re easier to blend and you’re less likely to go overboard. Powder can sometimes look chalky or patchy on lighter skin tones, especially if you’re heavy-handed.
If you do prefer powder, make sure to tap off excess product from your brush every single time. Less is always more with pale skin.
Where to Actually Contour

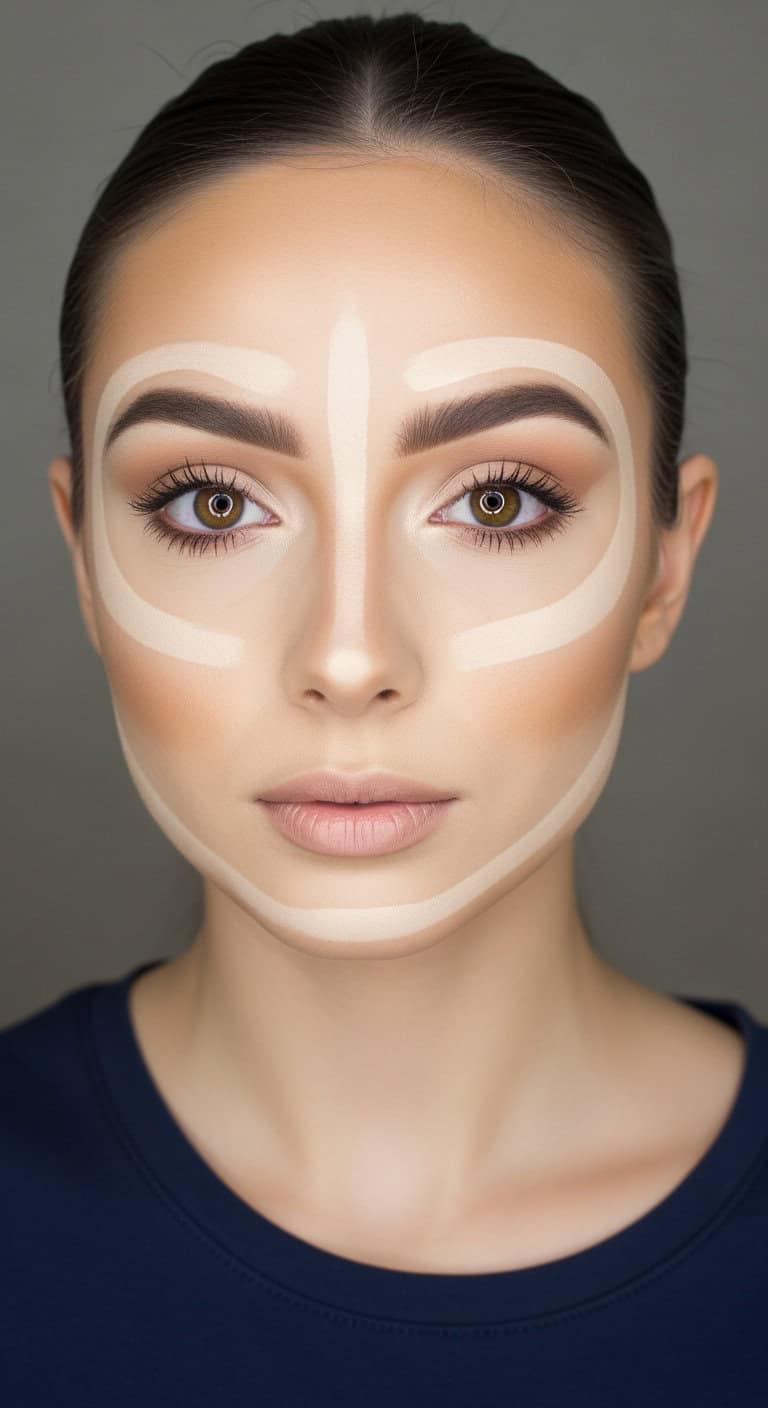
Forget those Instagram face charts with contour everywhere – that’s not realistic for everyday wear, especially on pale skin. Let’s focus on the areas that will actually make a difference.
The Cheek Hollows
This is your main event. Suck in your cheeks to find the natural hollow, then use your angled brush to apply contour just under the cheekbone. Start closer to your ear and work toward the center of your cheek, but don’t go all the way to your nose – that looks unnatural.
The key is to follow your natural bone structure, not try to create cheekbones where they don’t exist. Work with what you’ve got.
Temples
A little bit of contour at your temples can really help frame your face. Use a light hand and blend well – this area is close to your hairline so it’s super obvious if it looks muddy.
Jawline (Sometimes)
This one is optional and depends on your face shape. If you have a round face and want more definition, you can lightly contour along your jawline. But be careful – it’s really easy to overdo this and end up with a beard effect.
What to Skip
Nose contouring is tricky on pale skin and honestly not necessary for most people. Same with forehead contouring – unless you have a very prominent forehead, it’s probably just going to look obvious.
The Application Technique That Actually Works

Here’s where most tutorials get it wrong for pale skin. They tell you to apply product and then blend, but that often leads to over-application.
Build Gradually
Start with barely any product on your brush. Like, you should be wondering if there’s even any product there. Apply it where you want it, then assess. You can always add more, but taking away excess product is much harder.
Blend Immediately
Don’t let the product sit on your skin – blend it out right away while it’s still workable. Use small circular motions or gentle sweeping motions, whatever feels natural.
Check Your Work
Step back from the mirror and look at your face as a whole. Contour should enhance your natural features, not create new ones. If you can clearly see where you applied product, you need to blend more or use less next time.
Common Mistakes (And How to Fix Them)

Going Too Dark Too Fast
This is the big one. Start with a shade that’s maybe one or two shades darker than your skin tone, not five shades darker. You can always build intensity, but starting too dark usually means starting over.
Wrong Undertones
If your contour looks orange, muddy, or just “off,” it’s probably the wrong undertone. Cool-toned people need cool-toned contour, warm-toned people can handle slightly warmer shades, but everyone should avoid anything too bronze or orange.
Forgetting About Your Natural Coloring
Your contour should work with your natural coloring, not fight against it. If you’re very pink-toned, a gray-taupe contour will look more natural than a warm brown, even if that warm brown is technically the “right” depth.
Not Blending Enough
Pale skin shows everything, including harsh lines. When you think you’ve blended enough, blend a little more. The edges should be completely seamless.
Making It Look Natural

The goal with pale skin contouring is subtlety. You want people to think you have great bone structure, not great contouring skills.
Layer Lightly
Think of contouring like building a watercolor painting – you add thin layers to build up the intensity. One heavy application will just look obvious.
Match Your Base Makeup
Your contour should work with your foundation and concealer, not against them. If your base makeup is very light coverage and natural, heavy contouring is going to look out of place.
Consider Your Lighting
What looks good in your bathroom mirror might look overdone in office lighting. Natural light is always the most honest, so check your makeup there before you leave the house.
Product Recommendations for Different Budgets

High-End: Kevyn Aucoin Sculpting Powder, Charlotte Tilbury Filmstar Bronze & Glow, Fenty Beauty Match Stix
Mid-Range: NYX Wonder Stick, Milani Baked Bronzer in Dolce, Tarte Park Ave Princess
Drugstore: Wet n Wild MegaGlo Contouring Palette, L’Oreal True Match Lumi Bronze It, Maybelline Face Studio Master Contour V-Shape Duo
The Reality Check

Here’s the truth: contouring might not be for everyone, and that’s totally okay. Some people with pale skin find that a good blush and highlight give them all the dimension they need. Others prefer cream blush over contour for a more natural flush.
Don’t feel pressured to contour just because it’s trendy. If it doesn’t work for your lifestyle, your skill level, or your preferences, skip it. There are plenty of other ways to enhance your features.
Your Contouring Journey
The key to successful contouring on pale skin is patience and practice. Start small, build gradually, and don’t expect to nail it on the first try. Once you find the right shade and technique for your skin, you’ll wonder why it seemed so complicated in the first place. Remember, the best contour is the one that enhances your natural beauty, not masks it.

