4 Easy Methods to Make Your Concealer Darker – A Complete Guide
Understanding the need for a darker concealer
Realizing why you might need a darker concealer is as crucial as knowing how to darken it. There are several reasons why the concealer you’ve purchased might not be the ideal match for your skin anymore.
Firstly, your skin tone can change with the seasons. In the summer, you might find yourself a few shades darker due to increased sun exposure. Conversely, in winter, you might lighten up a bit. Here’s a quick look at how skin tone can vary:
| Season | Type of Change |
|---|---|
| Summer | Darker Shades |
| Winter | Lighter Shades |
Another reason could be that the product you bought online didn’t match your skin tone as perfectly as you thought it would. It’s a common issue, given that monitor calibration and lighting can alter how colors appear on screen.
“Finding the perfect concealer shade is like finding a needle in a haystack—a task that requires patience and sometimes, a little customization,” says a renowned makeup artist.
Lastly, perhaps you’re aiming for a contouring effect, which demands shades that are different from your natural skin tone. In such cases, having the skill to adjust your concealer’s shade becomes invaluable.
Remember, the goal is to ensure your makeup enhances your natural beauty by blending seamlessly with your skin. And sometimes, achieving that goal means making a few adjustments to your products.
Assessing the right shade
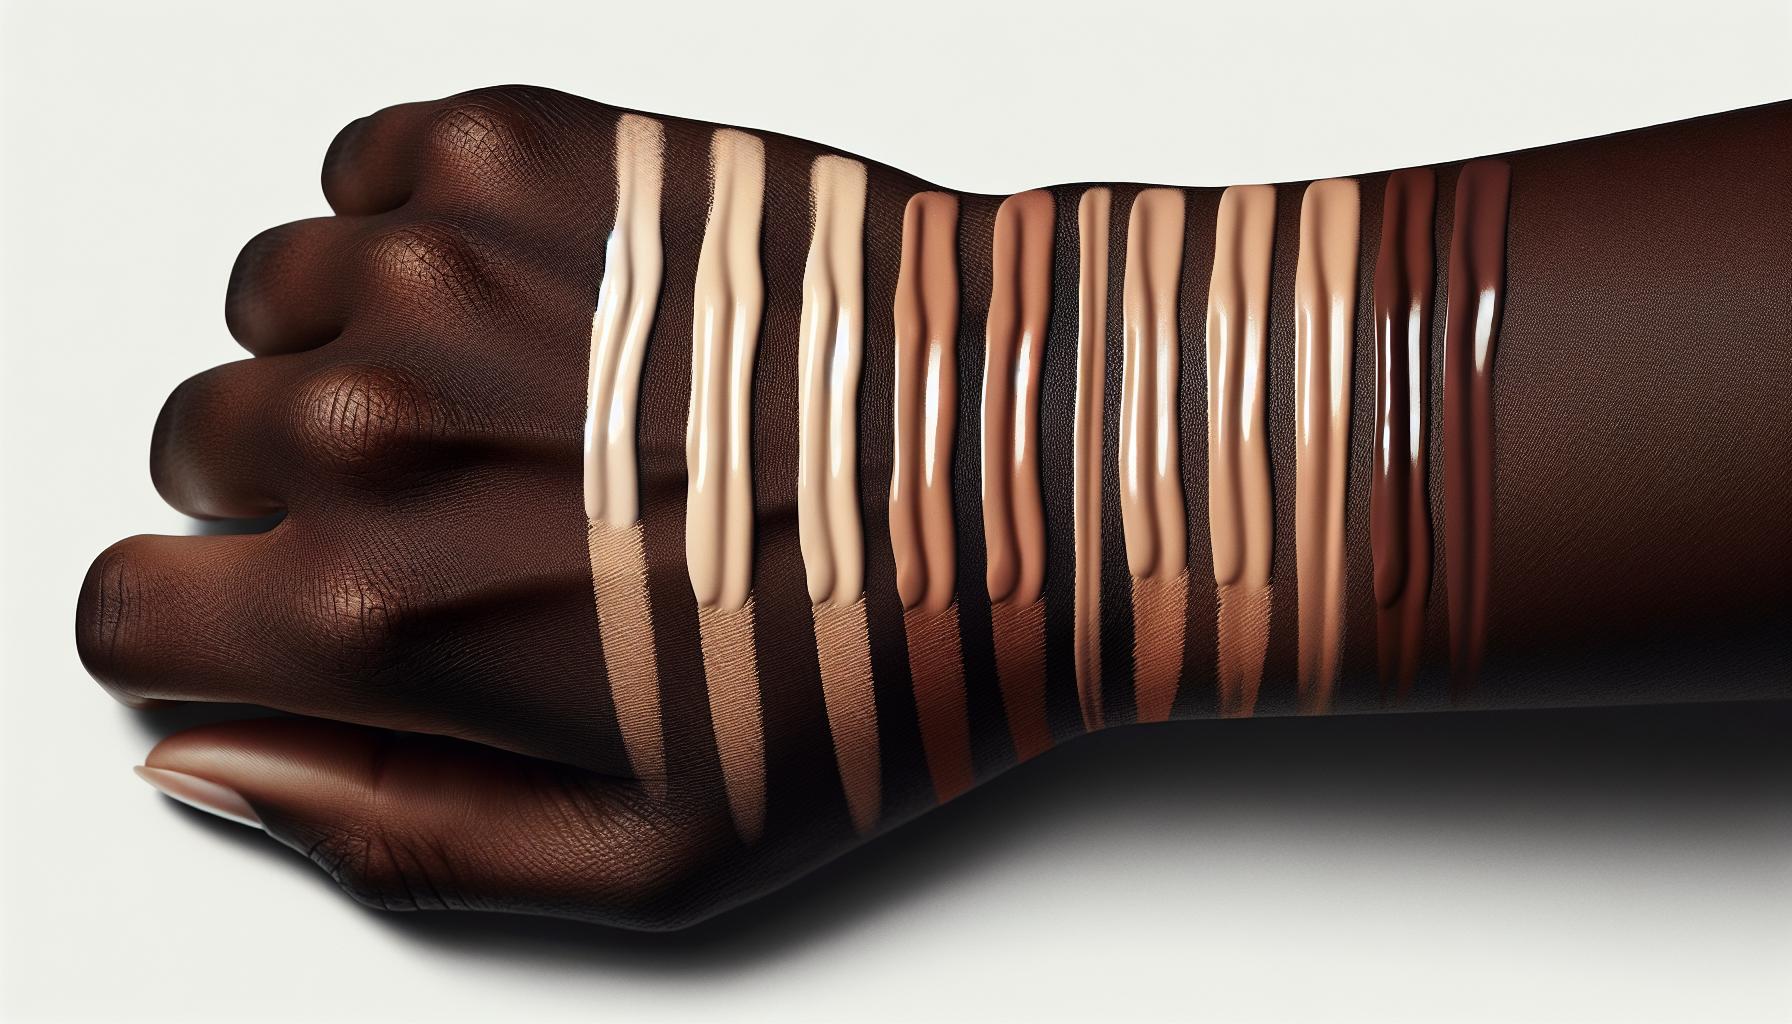
Before diving into making your concealer darker, it’s critical to assess the right shade for your skin. Skin tone isn’t just a single shade; it’s a spectrum that changes with seasons, exposure to the sun, and even health. Identifying your undertone is the first step. Skin undertones are generally categorized into three types: cool, warm, and neutral.
- Cool undertones have hints of blue or pink.
- Warm undertones appear peachy, golden, or yellow.
- Neutral is a mix of both.
Once you’ve pinpointed your undertone, finding a concealer that’s one to two shades darker than your natural skin tone becomes easier. This guideline helps in creating the perfect shadow effect for contouring or covering dark spots without it looking unnatural.
“The goal is to enhance, not mask your natural beauty.”
Here’s a simple guide to Shade Selection:
| Skin Tone | Undertone | Recommended Concealer Shade |
|---|---|---|
| Light | Cool | 1-2 shades darker with pink undertones |
| Medium | Warm | 1-2 shades darker with golden undertones |
| Dark | Neutral | 1-2 shades darker with neutral undertones |
Experimenting with different shades in natural lighting is the best way to find your match. Stores with generous return policies are beneficial, as they allow you to return products that don’t suit your skin tone after trying them at home.
Remember, the right concealer shade should blend seamlessly into your skin, slightly darker than your foundation, offering a natural finish that elevates your complexion.
Gathering the necessary supplies
Before diving into the process of darkening your concealer, it’s crucial to gather all the necessary supplies. Creating the perfect shade often requires a little bit of experimentation, but with the right tools by your side, you’ll be mixing like a pro in no time.
First on your list should be the concealer that you wish to darken. Ideally, this would be a concealer you love in terms of texture and coverage, but just isn’t quite the right shade. Alongside this, you’ll need a darker foundation or concealer. This product will be mixed with your original concealer to achieve the desired shade.
To make the mixing process easier and more precise, include a mixing palette and a spatula or mixing tool. If you don’t have a professional palette, a clean, flat surface like a dish or a piece of glass will work just as well.
Don’t forget about precision tools such as a fine brush or a sponge for application, ensuring you can blend your newly created shade seamlessly into your skin.
For a quick overview, refer to the table below:
| Supply | Description |
|---|---|
| Concealer to Darken | Your existing concealer that’s too light |
| Darker Foundation/Concealer | To adjust the concealer’s shade |
| Mixing Palette | A clean surface for combining products |
| Spatula or Mixing Tool | For thorough mixing |
| Fine Brush/Sponge | For application and blending |
Remember: The goal is not just to darken but to maintain the concealer’s integrity and finish on your skin. Thus, choosing a darkening agent with a similar formula is key.
In addition to these items, having natural lighting is often overlooked but essential. Seeing the true color of your mix in the type of light where you’ll most often wear it ensures accuracy.
Persistence and a bit of patience will be your best friends during this process. Since everyone’s skin tone and preferred coverage are different, you might not get the perfect shade on your first try. But with the right supplies at hand, you’re well on your way to becoming your own makeup artist.
Method 1: Mixing with foundation
When you’re looking to darken your concealer, one efficient way is by mixing it with a foundation that’s a shade or two darker. This method is popular for its simplicity and effectiveness. But before you start, it’s crucial to ensure that both products have similar formulas. Matching a water-based concealer with an oil-based foundation, or vice versa, could lead to a less than desirable texture.
To begin, squeeze a small amount of your concealer onto a clean mixing palette. Add a tiny dot of the darker foundation. Remember, it’s easier to gradually darken your concealer than to lighten it if you’ve gone too far. Using a mixing tool or spatula, combine the two products until you achieve a uniform color.
“Always start with less – you can add, but you can’t subtract.”
Testing the blend is crucial. Dab a small amount on your jawline to see how it meshes with your skin tone in natural light. If necessary, adjust the mix by adding more concealer or foundation until you’re satisfied with the shade.
Here’s a quick guide on the ratios to start with, but remember, these are just starting points:
| Starting Shade | Foundation:Concealer Ratio |
|---|---|
| 1 shade darker | 1:4 |
| 2 shades darker | 1:3 |
| 3 shades darker | 1:2 |
Bold experimentation and patience play a significant role in this process. While the above ratios are helpful, your unique skin tone may require adjustments to these proportions. Don’t hesitate to tweak the ratios to achieve that perfect match.
Method 2: Adding loose powder or bronzer
When your concealer isn’t matching your skin tone perfectly, another effective method to darken it is by adding loose powder or bronzer. This technique is especially useful if you prefer a certain level of mattification in your concealer or if you’re aiming to achieve a bronzed look.
Start by selecting a loose powder or bronzer that is one to two shades darker than your desired concealer shade. It’s crucial to pick a product that complements your skin’s undertone to ensure a natural blend. For instance, if you have a warm undertone, opt for a powder or bronzer with golden or peachy hues.
“Mixing the right amount of bronzer or loose powder with your concealer can provide not only the perfect shade but also an added glow.”
Here’s a quick guide on how to mix:
- Position a small amount of your concealer on a mixing palette or the back of your hand.
- Lightly tap the bronzer or loose powder onto the concealer.
- Use a mixing tool or your fingertip to blend the products until you achieve a consistent color.
- Test the newly created shade on your jawline under natural light.
Adjust the mix as necessary, remembering that it’s easier to darken the mixture with more powder or bronzer than to lighten it. Below is a table summarizing the starting mix ratios:
| Product | Starting Ratio |
|---|---|
| Concealer | 1 part |
| Loose Powder/Bronzer | 1/4 part |
Highlight: Always start with a lesser amount of powder or bronzer and gradually add more. This allows better control over the resulting shade and prevents wasting product.
Experiment with different ratios to find the perfect match for your skin tone. Additionally, practicing this method will help you become more proficient in customizing not only your concealer but other makeup products as well.
Method 3: Using an eyeshadow or blush
When traditional methods don’t quite hit the mark, reaching for your eyeshadow or blush can offer a surprisingly effective solution. These makeup staples, often rich in pigment, can deepen the tone of your concealer with just a few careful steps.
First, you’ll want to select an eyeshadow or blush that closely matches the outcome you’re aiming for. Matte finishes work best, as they blend more seamlessly with the concealer and avoid adding unwanted shimmer or texture.
Step-by-Step Guide:
- Select Your Pigment: Choose a matte eyeshadow or blush in a darker shade that complements your skin undertone.
- Mix: On a clean palette or the back of your hand, mix a small amount of the chosen pigment with your concealer. Start with a little, as you can always add more if needed.
- Test and Adjust: Apply a small amount of the mix to your jawline in natural light. Adjust the mix as necessary until you achieve your desired shade.
| Mix Ratio | Resulting Shade |
|---|---|
| 1:1 | Slightly darker |
| 1:2 | Moderately darker |
| 1:3 | Significantly darker |
Remember: It’s easier to darken a shade gradually than to lighten it, so start conservatively with the pigment.
Practicing this method not only broadens your makeup customization toolkit but also encourages creative approaches to achieving your ideal look. And as you experiment, keep in mind that the right shade is key to a flawless finish.
Method 4: DIY concealer palette
Creating your DIY concealer palette can offer unmatched versatility when it comes to customizing your concealer shade. This method isn’t just about darkening; it’s about having full control over the color spectrum at your fingertips.
Start by gathering a variety of concealer shades, including ones much darker than your natural tone. You’ll also need an empty palette and a tool for mixing, such as a small spatula or a toothpick.
“Mixing your shades lets you create the perfect concealer color for any season or reason.”
Here is a simple guide on how to create your palette:
- Step 1: Scoop out a small amount of each concealer shade and place them into different sections of the palette.
- Step 2: Mix a tiny bit of the darker shades with your lighter concealer to gradually achieve your desired darkness.
- Step 3: Test the mixed shade on your jawline to ensure it matches your skin tone perfectly.
Remember, it’s crucial to start with less darker shade and build up as needed. The beauty of a DIY palette is its flexibility.
| Factor | Importance |
|---|---|
| Shade Variety | High |
| Mixing Tools | Moderate |
| Palette Quality | Moderate |
Having a variety of shades not only allows for customization throughout the year as your skin tone changes but also offers opportunities for correcting and contouring. This method encourages you to become your makeup artist, experimenting and learning what works best for you.
Testing and adjusting the shade
After you’ve mixed your concealer with either a darker foundation, loose powder, bronzer, eyeshadow, or blush, the next crucial step is testing and adjusting the shade to ensure it’s just right for your skin tone. You don’t want to end up with a shade that’s too dark or too light, throwing off your entire makeup look.
First, apply a small amount of the adjusted concealer on your jawline. This area allows you to see how well the concealer blends with both your face and neck, providing a reliable indicator of the match.
“Always test in natural light for the most accurate results,” makeup artists often advise.
If after testing, the shade doesn’t seem quite right, don’t worry. Here’s what you can do:
- If too dark: Add a bit more of your original concealer or a lighter concealer to lighten it up.
- If too light: Incrementally mix in more of your darkening agent—whether it’s foundation, powder, or eyeshadow.
Refer to this table for a Mix Ratio Guide to help you adjust the concealer’s shade:
| Starting Shade | Approx. Ratio (Concealer: Darkening Agent) | Desired Outcome |
|---|---|---|
| Half a shade lighter | 1:0.25 | Slightly darker |
| One shade lighter | 1:0.5 | Noticeably darker |
| Two shades lighter | 1:1 | Significantly darker |
Remember, it’s always easier to darken a too-light concealer than lighten one that’s become too dark. So, when adjusting, proceed with a light hand and add your darkening agent gradually.
By mastering the art of testing and adjusting your concealer’s shade, you are taking a big step towards achieving that flawless makeup look that seems effortlessly perfect. Your skin tone is unique, and now your concealer will be too.
Storing your custom darker concealer
After you’ve nailed the perfect shade of darker concealer through mixing, storing it properly ensures that it stays fresh and ready for your next application. Here’s what you need to know about keeping your customized concealer in tip-top condition.
Choose the Right Container
Selecting an appropriate container is crucial. Ideally, you want something airtight to prevent the concealer from drying out. Small cosmetic jars or cleaned out original concealer containers work wonderfully.
Tip: “Always opt for dark or opaque containers to protect the product from light degradation.”
Location Matters
Humidity and direct sunlight are the enemies of your custom concealer. Store your product in a cool, dry place, away from the bathroom if possible, where temperatures and moisture levels can fluctuate.
| Ingredient | Shelf-Life Impact |
|---|---|
| Original concealer | Varies by brand |
| Darkening agent (powder, eyeshadow, etc.) | May reduce shelf-life |
| Mixing tools | Must be sterile to avoid contamination |
Keep in mind that adding any ingredient to your concealer might alter its original shelf-life. As a general rule, if the color, smell, or texture changes, it’s time to whip up a fresh batch.
Keeping your DIY darker concealer in prime condition isn’t just about where you store it but also about how you care for it. Always use clean tools to avoid introducing bacteria, and ensure your hands are clean before every use. This attention to detail not only extends the life of your custom concealer but ensures it’s safe for your skin every time.
Conclusion
After mixing your concealer with a darkening agent, it’s vital to test and adjust the shade to ensure it matches your skin tone perfectly. Apply a small amount on your jawline, and check the color in natural light. This step might require a bit of back and forth, mixing and testing, until you find the perfect match.
Here’s a quick mix ratio guide to help you get started:
| Starting Shade | Desired Outcome | Darkening Agent Ratio |
|---|---|---|
| Light | Medium | 1:3 (Concealer:Darkener) |
| Medium | Dark | 1:2 (Concealer:Darkener) |
| Dark | Deeper | 1:1 (Concealer:Darkener) |
Remember, it’s easier to darken a shade than to lighten it, so proceed with a light hand and add your darkening agent gradually.
Caring for Your Custom Concealer
Choosing the right container for your darker concealer is essential. Opt for an airtight and opaque container to minimize exposure to air and light, both of which can alter the product’s color and consistency over time. Storing your custom-blended concealer in a cool, dry place will also help preserve its longevity and efficacy.
Be mindful that introducing any darkening agents could impact the shelf-life of your concealer. Always use clean tools and hands when applying to avoid introducing bacteria, which can further shorten its usable life.

